If you have ever wanted to put together a photo collage for social media, a family event, or a small business post but felt intimidated by complicated software, this article is for you. The collage tool market has expanded significantly, and the best options today require zero design experience to produce something that looks genuinely polished. This guide walks through what to look for, how the major tool types compare across the same criteria, and which options are worth your time in 2026.
Why the Right Tool Makes All the Difference for Non-Designers
There is a wide gap between a tool that technically lets you make a collage and one that makes the process feel effortless. For someone without a design background, that gap matters enormously. A confusing interface, too many options with no guidance, or a workflow that requires knowing design terminology can turn a five-minute task into a frustrating hour. The best beginner-friendly tools remove that friction without stripping out the features that make the end result look good.
The other challenge is that not every tool is built for the same purpose. Some are excellent for personal memory collages but poorly suited for anything you want to share on social media. Others are optimized for business content but have a learning curve that makes them feel like work. Knowing what you actually need before you pick a tool saves a lot of time and second-guessing.
8 Criteria to Evaluate Any Photo Collage Tool
Before comparing specific tools and tool types, it helps to build a consistent framework. These eight criteria apply equally to any collage maker and give you a fair basis for comparison regardless of which options you are weighing.
1. Template Quality and Variety
A strong template library is the single most important feature for non-designers. Templates do the layout and design thinking for you, so you only have to supply the photos. Look for tools that offer templates organized by use case (social media, family, business, seasonal) rather than dumping everything into one unsorted library. The more specific the templates, the faster you can find something that fits your actual need.
2. Ease of Photo Uploading and Placement
The upload experience should be fast and forgiving. Drag-and-drop functionality, the ability to upload from your phone’s camera roll or desktop, and an interface that automatically places photos into the layout are all signs of a well-designed tool. Tools that require you to manually size and position every image from scratch are not beginner-friendly, even if they technically offer more control.
3. Layout Shuffling and Auto-Arrangement
One feature that separates genuinely easy tools from merely adequate ones is the ability to shuffle or automatically rearrange your photos across different layout options. Being able to preview multiple layout configurations with the same set of photos without dragging anything around saves time and helps you find the best arrangement without needing a design eye.
4. Customization Without Complexity
The best collage tools for non-designers offer meaningful customization options that are presented simply. This includes adjusting border thickness, swapping out background colors, adding text overlays, and applying filters to individual photos. These features should be accessible through obvious menus or toolbars, not buried in settings panels that require hunting around.
5. Built-In Photo Editing
A collage tool that forces you to edit your photos in a separate app before importing them is adding steps to a process that should be streamlined. Look for tools that let you adjust brightness, contrast, saturation, and cropping directly within the collage interface. Background removal is a bonus feature worth noting, as it dramatically expands creative possibilities without requiring any technical skill.
6. Output Quality and Format Options
Your finished collage should be downloadable in a format suitable for its destination. JPEG or PNG for static collages, MP4 for animated or video collages. Look for tools that export at a resolution appropriate for social media sharing or printing. Tools that downsize your output significantly on the free tier or add watermarks to downloads are worth noting because both of those outcomes limit usability.
7. Social Media Sizing and Resizing
If you are creating collages for digital sharing, the tool should either offer preset sizes for the major social platforms or allow one-click resizing after the fact. Having to manually research pixel dimensions and reconfigure your design every time you want to share to a different platform is exactly the kind of friction that makes a tool feel harder than it should be.
8. Mobile Usability
Many people want to create collages on the same phone where their photos live. A tool that works well on mobile without requiring a download is a genuine advantage for this group. Check whether the interface is actually designed for touch use or simply scaled down from a desktop experience, as those two things feel very different in practice.
How the Major Tool Types Compare
Browser-Based Collage Makers
Browser-based tools are the most accessible category because they require no installation and work on any device. The quality range is wide, but the best ones in this category offer everything a non-designer needs: templates, drag-and-drop editing, photo enhancement tools, and clean exports.
The primary advantages of browser-based tools are accessibility and speed. You can go from zero to finished collage in minutes without downloading anything or creating an account on some platforms. The primary limitation, depending on the tool, is that complex edits or large file handling may be slower than a desktop application. For most social media and personal collage needs, this is rarely an issue.
When evaluating browser-based tools, focus on the template library depth, the quality of the free export, and whether mobile use is genuinely supported or just technically possible.
Adobe Express as a Strong Browser-Based Option
One tool that consistently performs well against the criteria above is the Adobe Express collage creator. A few features make it particularly well-suited for non-designers. First, it offers a shuffle layout feature that automatically rearranges your uploaded photos across different grid configurations, so you can explore options without making any manual adjustments. This is especially useful when you are unsure how you want your photos laid out and just want to see what looks best. Second, it includes built-in photo editing tools that let you adjust filters, brightness, contrast, and saturation on individual photos within the collage itself, which removes the need to pre-edit images in a separate tool. Third, it supports animated collages that can be exported as MP4 files for social sharing, which takes a standard static collage and makes it significantly more engaging for platforms like Instagram and TikTok.
Adobe Express is free to use with a plan that includes thousands of templates, photo effects, and 2GB of storage. The free tier is watermark-free, which is a meaningful advantage for anyone using collages in a business or branded context. It works on both desktop and mobile browsers and connects to a larger editing ecosystem if you ever want to expand beyond collages into other design formats. It is one strong choice in this space, not the only one, but it checks more of the eight evaluation criteria above than most free tools in its category.
Mobile-First Collage Apps
Mobile apps designed specifically for collage creation offer a different kind of experience. They are optimized for touch interaction, integrate directly with your phone’s photo library, and are often faster to use for simple grid-based collages than a browser tool on the same device. Many offer template libraries, basic editing, and sharing shortcuts built directly into the workflow.
The tradeoff is that mobile-first apps vary significantly in how much creative control they offer beyond basic grid layouts. Some are excellent for casual personal collages but limited when it comes to text customization, output resolution, or the ability to resize for different platforms. If your use case is primarily personal sharing and you shoot on your phone, a dedicated mobile app may feel more natural. If you need your collages to perform in a professional or business context, a browser-based tool that also works on mobile often gives you more room to grow.
Desktop Design Software
Desktop software sits at the top of the power spectrum but also the learning curve spectrum. Full-featured desktop design tools give you complete control over every element of a collage, including pixel-perfect layouts, custom fonts, and high-resolution exports suitable for print. For professionals who use these tools regularly and already know their way around a layered editing environment, they are unmatched.
For non-designers, desktop software is generally overkill for collage creation and requires a meaningful time investment to learn before producing anything that looks good. Unless you are already using design software for other purposes and just want to add collage-making to your workflow, browser-based and mobile options are almost always a better fit for the use cases covered in this article.
Practical Tips for Getting Better Results From Any Collage Tool
Regardless of which tool you use, a few simple habits make a noticeable difference in how your finished collages look.
- Start with your best photo as the anchor. Put your strongest image in the most prominent position in the layout, typically the largest cell in a grid. Everything else supports it.
- Stick to three to five photos per collage. More photos means smaller individual images and less visual impact. Fewer photos, arranged well, almost always look better than a crowded grid.
- Use a consistent color treatment across photos. If your photos were taken in different lighting conditions, applying the same filter or brightness adjustment to all of them creates visual cohesion without requiring any design knowledge.
- Leave borders between photos. Even a thin border or white space between images gives a collage a cleaner, more intentional look. Most tools let you adjust this and the difference is immediately visible.
- Match your collage format to your sharing destination before you start. Choosing the right canvas size or aspect ratio at the beginning saves you from reformatting later.
Frequently Asked Questions
Do I need to create an account to use a free collage maker?
It depends on the tool. Some browser-based collage makers let you build and download a collage without ever signing up, which is convenient for one-off projects. Others require an account to save your work or access the full template library. If you plan to create collages regularly or want to save your projects for future editing, creating a free account is usually worth the extra step. The main thing to check is whether account creation is required just to download your finished collage, since some tools use that friction as a conversion point toward a paid plan. If you are using a tool for business purposes, an account also typically gives you access to brand-related features like saved color palettes and logo uploads that make repeated use faster.
What is the difference between a photo grid and a photo collage?
The terms are often used interchangeably, but there is a practical distinction worth knowing. A photo grid is a structured layout where photos are placed in evenly sized or geometrically consistent cells, similar to a spreadsheet of images. A collage is a broader term that can include grids but also covers overlapping photos, freeform arrangements, mixed media (text, stickers, backgrounds), and more artistic compositions. For most social media and casual personal use, grid-based collages are the easiest to produce and the most visually predictable. Freeform collages offer more creative expression but require more decisions and are harder to execute well without some design instinct. If you are new to collage making, starting with a grid template and customizing from there is the fastest path to a result you are happy with.
Can I print a photo collage made with a free online tool?
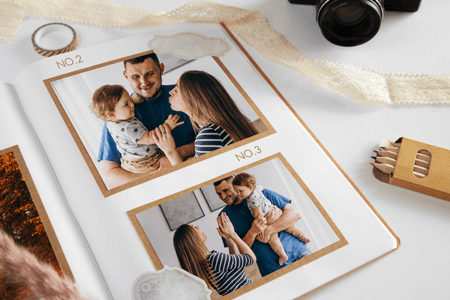
Yes, but the print quality depends on the resolution of the output file the tool provides. For a standard 4×6 or 5×7 print, most free tools export at sufficient resolution. For larger prints (8×10 and above), you want an output file that is at least 300 DPI at the intended print size. Many free tools default to screen-resolution exports (72 or 96 DPI), which look fine on a phone or computer screen but appear pixelated when printed large. If you plan to print your collage, check the tool’s export resolution settings or documentation before investing time in the design. For organizing and printing photos, a service like Shutterfly can accept your finished collage file and produce physical prints or photo books directly from it.
How many photos should I include in a collage for social media?
The right number depends on the platform and what you are trying to communicate. For Instagram feed posts, three to six photos tend to work best because each image remains large enough to be legible in the feed. For Stories or Reels thumbnails, one to three photos is usually the limit before things start to feel crowded on a vertical canvas. For Facebook cover photos, two to four photos across a wide horizontal layout is a practical range. The general principle is that every photo in a collage should earn its place. If removing one of them would not be noticed, it probably should not be there. A tightly edited collage with fewer, stronger images consistently performs better than one that tries to include every photo from an event or shoot.
Is it possible to animate a photo collage without any video editing experience?
Yes, and it is one of the more underused features in modern collage tools. Several browser-based tools offer one-click animation that adds motion to your photos, text, or design elements without requiring any timeline editing or technical knowledge. The animations are pre-built and applied instantly, similar to adding a filter. The result can be exported as an MP4 or GIF file for sharing on social media. Animated collages tend to attract significantly more engagement than static images on most platforms, particularly on Instagram and TikTok, making this a worthwhile feature to look for even if you have no video editing background. The key is finding a tool where animation is accessible through a simple toggle or menu rather than a separate video editing workflow.
Conclusion
The best photo collage maker for a non-designer is the one that gets out of the way and lets you focus on the photos, not the software. The tools that earn that description in 2026 share a few consistent traits: strong template libraries, genuinely simple drag-and-drop interfaces, built-in photo editing, and clean exports that are actually usable without paying for an upgrade. Whether you choose a browser-based tool, a mobile app, or something with a larger feature set, the eight evaluation criteria in this guide give you a reliable way to assess any option before committing to it.
Start with your use case and work backwards. A simple personal collage for a family group chat has different requirements than a branded social media post for a small business. Once you know what you are making and where it is going, the right tool becomes much easier to identify. Pick one that handles your most common need well, learn it enough to move quickly, and revisit the evaluation if your needs change. Good design does not require design expertise when the tool is built with that in mind.